How to Capture Lens Flare with Your DSLR
by Cody Johnson | Jul 6, 2012 | How Tos
Back in the days of classic film photography, lens flare was considered more of a nuisance than an artistic statement, considering the cost of film. Now that DSLRs have made digital photography the standard, lens flares have caught on as a creative way to add a bit of visual interest to photos. Let’s explore how to use lens flare in creative digital photography.
What is Lens Flare?
Lens flare is caused by light reflecting off of the inner and outer surfaces of the camera. What’s actually happening is that the light is entering the camera perpendicular to the lens, so the light travels around the inside of the lens before it reaches the image sensor. The sun is the simplest light source to use for flare, although any strong light source can produce the effect. It’s easiest to produce flare from a light source when the source is near the horizon of your image or just above or outside your image.
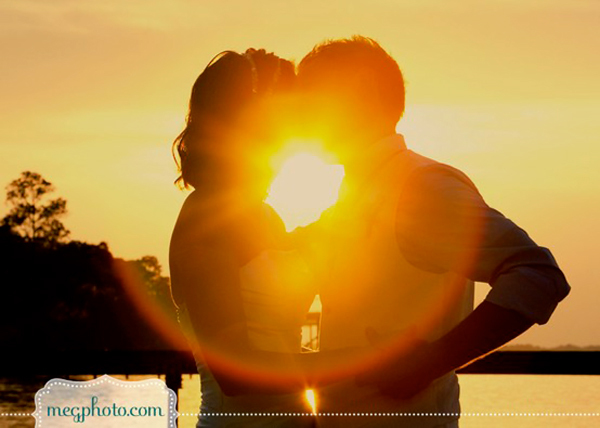
There is no magic angle for capturing flare in digital photography, but typically catching the light source partially behind your subject will produce reliable flare. Catching only half of the light source in your lens will usually cause this effect as well. Lens flare can be circular, diffuse, or angular:
- Circular lens flare is a circle of light appearing around the main light source, that might make anything in the circle look overexposed. This lens flare usually occurs when the light source is near the horizon.
- Diffuse lens flare is a glow that appears across most of an image. Strong diffuse lens flare will “blow out” most of the image, so that the background and other aspects are replaced by light. This type of lens flare usually occurs with a very strong light source and a wide aperture.
- Angular lens flare is the easiest to identify and create. When the light source is outside of the frame, a ‘trail’ of light appears on the photo as lens flare. This type of lens flare usually occurs when the light source is just outside the frame.

How to Capture Lens Flare
Lens flare can be captured in auto mode, since even the best DSLRs can’t prevent lens flare. Many camera lenses and filters have anti-reflection (also called anti-glare) coatings to reduce this effect, but a strong light source at the right angle will still always produce flare. However, on auto mode, unless the settings are changed DSLRs will usually expose for the brightest area of the picture; if you are shooting for flare, the light source you’re using will be properly exposed, and everything else will look too dark. This is fine for silhouette photos, but most shooters won’t be satisfied with this result.
In order to make sure that your subject is exposed correctly, it is best to use manual shooting when you want lens flare in your digital photography. Here are a few guidelines on the settings to use.
- The longer the shutter speed used, the more lens flare will be visible in the photo, since a longer shutter speed lets in more light.
- A smaller aperture can increase dramatic effect of lens flare, especially in dark conditions. Use a smaller aperture for circular and angular lens flare. For a diffuse flare, you’ll need to use a wider aperture.
- Filters increase the likelihood of lens flare, since a filter adds another surface from which light can reflect.
 How to Add Lens Flare Effects
Sometimes it’s easier to add lens flare effects using common software and apps, since to create true lens flare the timing of your images has to be perfect, and this doesn’t always happen – especially when your subject is kids!
- Photoshop Essentials has a photo tutorial on adding lens flare with Photoshop.
- With Serif PhotoPlus, you can add lens flare with the render filters.
- LensLight, from the iTunes store, is a specialty app for light effects for digital photography editing with your iPhone. It’s definitely worth $0.99!

Photo Credit links:
Thierry Lebraly Photography
Cande-Knd at Deviantart.com

 How to Add Lens Flare Effects
Sometimes it’s easier to add lens flare effects using common software and apps, since to create true lens flare the timing of your images has to be perfect, and this doesn’t always happen – especially when your subject is kids!
 Photo Credit links:
Thierry Lebraly Photography
Cande-Knd at Deviantart.com

