So you’ve finally decided which of your newest photography adventures are worthy of being printed and decided on a frame to show off your artwork. Are you going to mat it? Deciding to mat or not to mat is sometimes a more difficult choice than it seems on the outside; on the one hand, matted artwork makes it obvious at a glance that you put a lot of effort into your photo framing, but on the other hand, you don’t want to distract from your photos. There are no hard and fast rules for matting digital photography, but there are some rules of thumb that you might find helpful.
It’s more modern not to mat.
If you go into any art gallery, you’ll probably see that most digital photography is not matted, especially larger pieces. The art world has trended towards dropping mats for most pieces of artwork for a variety of reasons, but what it means to you is that it’s more contemporary not to have a mat.
Your frame might tell you if you need to mat.
It’s somewhat counter intuitive, but the more ornate or thick your chosen frame is, the better your digital photography will look with a mat. Not only does tradition lead our eyes to expect a mat with more complicated frames, but a decorated frame will threaten to overwhelm your photo without the negative space provided by a mat.

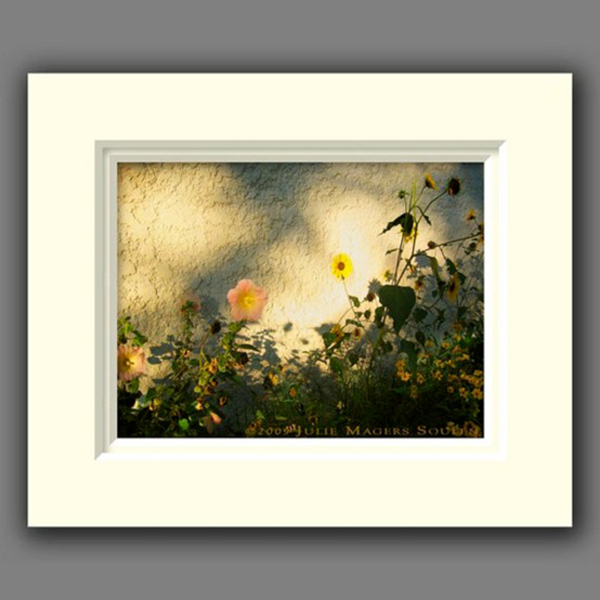
This simple frame and detailed photo go perfectly well together without a mat.
Photo courtesy
JulieMagersSoulen
If you have a series, it’s better not to mat.
If your photo framing project involves a series of photos that are closely related to one another or were all taken on the same day, it might be better not to mat. Mats can break up series and distract from the flow of the story. The exception here is single mats with multiple windows prepared for a single frame, which can still work for series when the photos are printed in smaller sizes (think 5x7 to 8x10).
If you’re matting, think hard about doing it yourself.
Certain aspects of photo framing lend themselves to the do it yourself approach, but matting is not one of them, especially cutting the mat. You should know that even professional framers usually agree that cutting a mat is the hardest part of framing, and to do it successfully requires a number of tools that don’t make sense to purchase unless you’re doing this regularly.
Choose colored mats by the frame and tone.
There are a few rules of thumb for choosing a mat color. For plain frames, colored mats are easier to match. The color of the mat should be present in the photograph, and match as closely as possible to the lightness and tone of that color in the photo. Additionally, dark photos should usually have a dark colored mat (or black), and light photos should usually have a light colored mat (or white/off-white). The darkness and lightness will especially impact your mat choice with black and white photography, which usually looks great with a clean white mat but might look better with a dark grey or black mat depending on the feel of the photo.

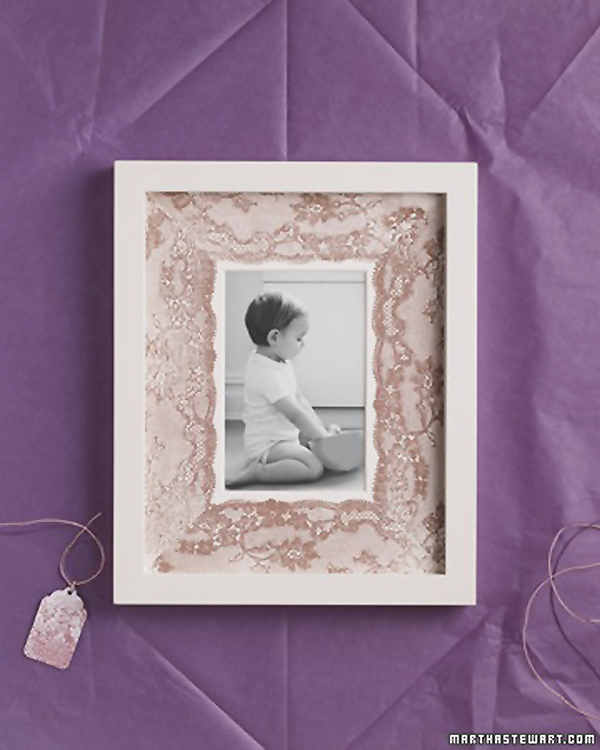
This busy colored mat idea works because the photo and frame are both simple.
Photo courtesy
MarthaStewart.com
Don’t date your artwork.
Ever see a piece of dated artwork, maybe that flower picture hanging in your aunt’s kitchen with the teal mat? It’s probably the mat dating the artwork. Always go as neutral with your mat color as you can to avoid prematurely dating your artwork, unless you’re matting on a budget and don’t mind changing out today’s hot color six months from now.
One final piece of advice: Always choose archival materials when matting your digital photography. Yes, archival – which means durable and acid free, typically free of any wood products – is more expensive, but it reduces the chances that your artwork will be damaged over time by harmful products in the mat, ensuring that all of the effort you put into photo framing lasts for years.
 This simple frame and detailed photo go perfectly well together without a mat.
Photo courtesy JulieMagersSoulen
If you have a series, it’s better not to mat.
If your photo framing project involves a series of photos that are closely related to one another or were all taken on the same day, it might be better not to mat. Mats can break up series and distract from the flow of the story. The exception here is single mats with multiple windows prepared for a single frame, which can still work for series when the photos are printed in smaller sizes (think 5x7 to 8x10).
If you’re matting, think hard about doing it yourself.
Certain aspects of photo framing lend themselves to the do it yourself approach, but matting is not one of them, especially cutting the mat. You should know that even professional framers usually agree that cutting a mat is the hardest part of framing, and to do it successfully requires a number of tools that don’t make sense to purchase unless you’re doing this regularly.
Choose colored mats by the frame and tone.
There are a few rules of thumb for choosing a mat color. For plain frames, colored mats are easier to match. The color of the mat should be present in the photograph, and match as closely as possible to the lightness and tone of that color in the photo. Additionally, dark photos should usually have a dark colored mat (or black), and light photos should usually have a light colored mat (or white/off-white). The darkness and lightness will especially impact your mat choice with black and white photography, which usually looks great with a clean white mat but might look better with a dark grey or black mat depending on the feel of the photo.
 This busy colored mat idea works because the photo and frame are both simple.
Photo courtesy MarthaStewart.com
Don’t date your artwork.
Ever see a piece of dated artwork, maybe that flower picture hanging in your aunt’s kitchen with the teal mat? It’s probably the mat dating the artwork. Always go as neutral with your mat color as you can to avoid prematurely dating your artwork, unless you’re matting on a budget and don’t mind changing out today’s hot color six months from now.
One final piece of advice: Always choose archival materials when matting your digital photography. Yes, archival – which means durable and acid free, typically free of any wood products – is more expensive, but it reduces the chances that your artwork will be damaged over time by harmful products in the mat, ensuring that all of the effort you put into photo framing lasts for years.
