Pain Free Guide to Hanging Your Artwork
by Cody Johnson | Sep 17, 2013 | Art & Decor
Hanging your artwork can be an exercise in frustration, not least because with the work that you put into selecting the art to be hung and the frames to set it off you do not want to make a mistake! Although it takes time and effort to create expert-looking results, hanging your artwork does not have to be a puzzle. Spend more time admiring your work and less time hanging it with these hanging tips for grid and photo collage systems.
The Dreaded Grid: How to Get It Straight
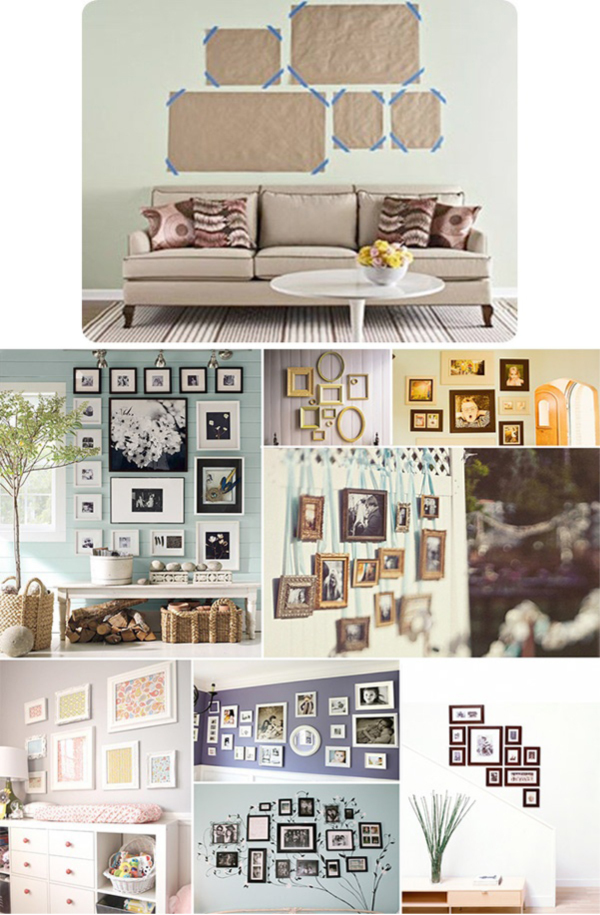
Hanging your artwork in a grid format gives your photo collections a gallery ready look that is eye catching and perfectly symmetrical. If only hanging a grid were as easy as it looks! In order to work, a grid must be perfectly straight on all four sides, with even spacing between the frames. Try the following to make getting a grid straight easier than ever.
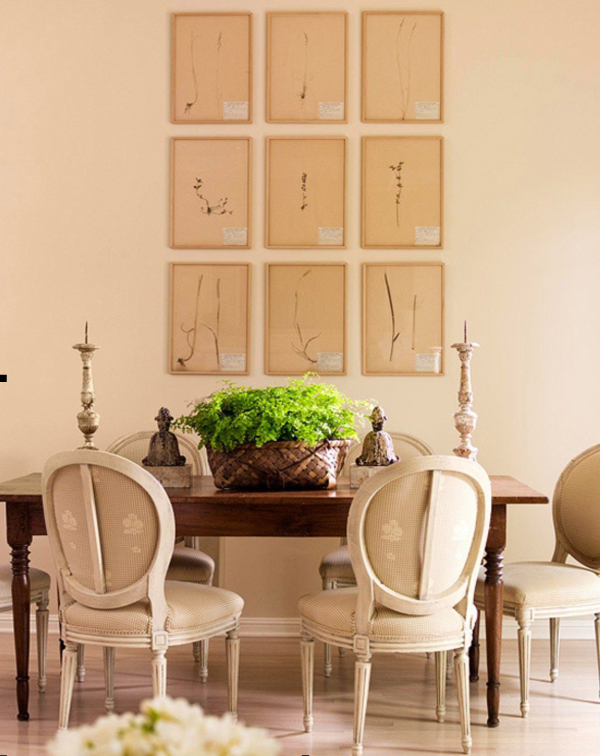
Photo courtesy of Better Homes and Gardens
- Make sure that the wires or other hanging materials on each of your frames hangs at the exact same spot before getting started. If they do not, you may need to tighten the wires or make other adjustments.
- If you have one, or can borrow one from a friend, a laser level can help you breeze through placing and hanging a symmetrical photo grid.
- Hang from the bottom up, which makes it easier to introduce adjustments once you get started.
- Think about using two pictures hooks per piece, which can help artwork remain level.
- Use a hanging and leveling tool like Under the Roof’s Hang & Level, which you can buy online or in select retail outlets.
- If you are on a strict budget or can’t get out to the store, check out this awesome DIY grid hanging tool at http://bit.ly/nIC8h7
Mastering the Expert’s Photo Collage Techniques
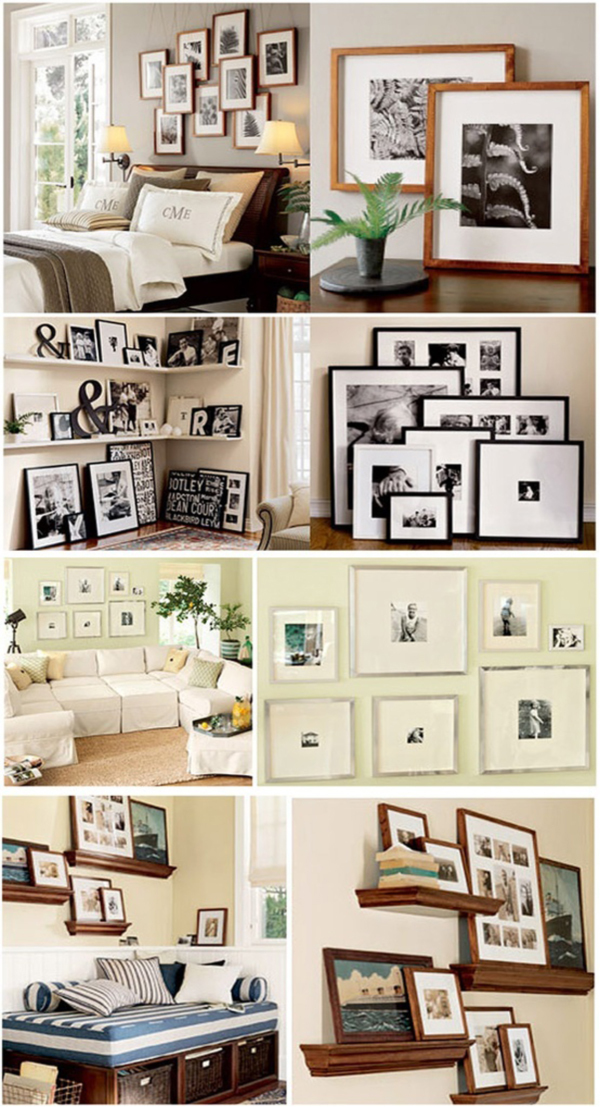
The easiest way to create an expert looking photo collage or salon of different sized photos or canvas prints is to plan ahead, but if you have already begun to collect the pieces you want to use in hanging your artwork as a photo collage, you can still use these tips to make it easier.
- Get a preview on how your different sized photos might look in various pairings using tools like PhotoGrid for Android phones or PhotoGrid for Apple devices.
- If you have Photoshop, try previewing your photo layout using these handy templates from Digital Camera World.
- Clear a space on the floor to try arranging the pieces you are going to hang as they might appear on the wall. Measure the exact spacing you have vertically and horizontally when you have found the right arrangement, and transfer this to a layout on paper so you remember where everything is going to go once you get started.
- It’s often simpler to start hanging in the middle with a photo collage, since the middle becomes the reference point in any asymmetrical hanging. If you want the middle piece at eye level, divide the frame’s height by two, and then subtract the distance between the hanging hardware and the top of the frame. Next, add your result to 57, 58, 59, or 60 – 57 to 60 being the average eye-level heighth.
If you are still finding hanging your artwork to be too much of a challenge for the results you want, you might consider using a life-size template system to make your marks for hanging. Most major arts and crafts and framing supply stores carry these, and if you are using mostly standard-sized frames, it can be worth the investment. No matter what system you use, just remember that the results you achieve when hanging your artwork is completed make it all worth while.