Skill level – Intermediate to Advanced. As a photographer, you must have struggled with exposure, white balance, tone and contrast, every time you grabbed your camera for a perfect shot. The magic ingredient for a picture-perfect scene is the nuances of light that play together for a great photograph. If you are relying on a natural light source, it can be amazing to see how it can change in a couple of minutes and affect your photograph.
Regardless of whether you engage in photography at an indoor location or outside in the natural environment, you are going to have a key light, a high intensity source, focused on the object. Apart from the key light that defines the lighting, you also need to have a fill light.
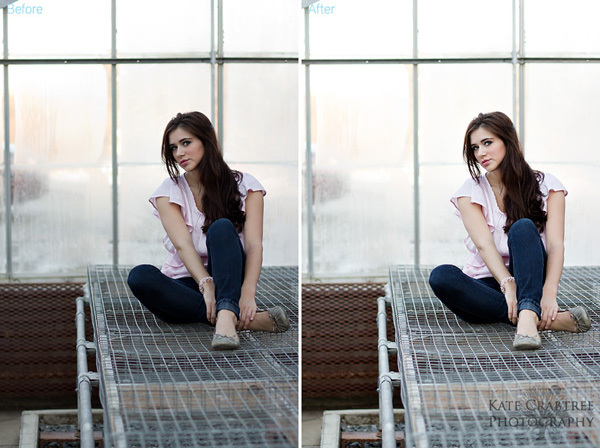
Fill light controls the lightness and darkness of the resulting shadows created by the key light. It acts as a secondary light source that doesn’t create any visible shadows. For example...think of a bright sunny day when the sun is directly overhead. People faces will have deep shadows under their eyebrows. Fill light will help to illuminate those areas that are in too much shadow.

Photo courtesy of Bangor, Maine wedding and portrait photographer Kate Crabtree
http://www.katecrabtreephotography.com
Fill Light For Better Pictures
Usually, the fill light has to be placed opposite to the main light so that any shadows on the subject that are on the side away from the key source are lit up. When shadows are unveiled, immense details are revealed that were otherwise hidden away. When you use fill light, make sure that it has less intensity than the main light. You might also want to consider the effects of ambient light (from any room lights or windows, incase you are working indoors) on the white balance of your shot.
As compared to the main light, the fill light is half its brightness. However, if you feel your photographs seem to suffer from excessive brightness, you can resort to using softer lights, placing scrims and diffusers or placing it further away from the camera. By the way a scrim is a fancy word for a diffusing material. You could use a napkin as a scrim in a pinch.
Since all lights are bound to create shadows, the fill light should be placed as close as possible to the camera-to-subject axis. You will notice that all the shadows created by the key light move on behind the subject and are no longer noticeable by your camera.
Selecting A Fill Source
Using Reflectors
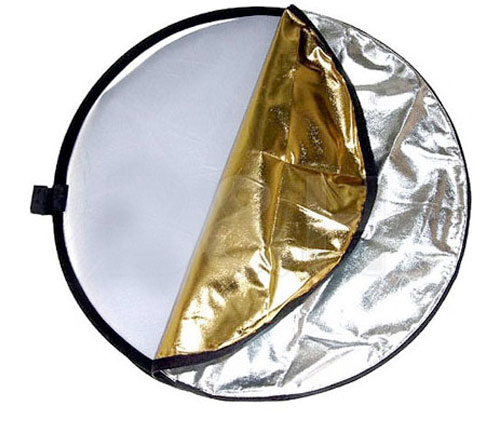
Reflectors are perhaps the most inexpensive method of adding fill light to your shot. Simply put, reflectors just reflect light by aiming lights onto the dark spots to diffuse unwanted shadows. You can choose the amount and specularity of the fill by choosing from reflectors of various sized and surfaces. Keep in mind, the color of the reflector can modify the light quality and can be used for different effects. For instance, for warm tones and tanned effects, gold color reflectors are best. In case you are capturing a close-up shot, use a diffuse white card for natural effects. Sometimes, reflectors might not work very well indoors because the key light source is not as bright as the sun outside. For such cases, you might simply use a large, white card on the opposite side.

Using Flash
Sometimes, you may want to use to use the in-camera flash for fill light. If you have a camera that adjusts its flash automatically to ambient light conditions, then you can easily have a perfect balanced fill-flash. While capturing outdoors, you can use flash on overcast days or on bright sunny days to soften hard shadows that hide important subject detail. For some serious photography, you can use a high-end flash unit and set ambient light exposure compensation and flash exposure compensation simultaneously.
Creative Uses For Fill Light
If you are trying to capture a flower dancing to the wind, use a
high speed flash sync that comes with many high-end flash units. Set it to a 1/500 sec shutter (sync) speed, ISO to 400 or 800 if the subject is not within a few feet of the camera and voila!
For low lights and brilliant sky backgrounds, you can overpower the daylight with flash for optimal color saturation in the background. If the daylight exposure is 1/15 second at f/8, adjust your flash output to f/11, a stop more powerful than the daylight. Enjoy the results!
To see more of Kate's beautiful images go to:
www.katecrabtreephotography.com  Photo courtesy of Bangor, Maine wedding and portrait photographer Kate Crabtree
